

Make-up guide for the cosmetically impaired
 |
| Beware spoilers: Finished look |
But Ey if you would like to rock the early 80s look I am happy to do a tutorial on that too!
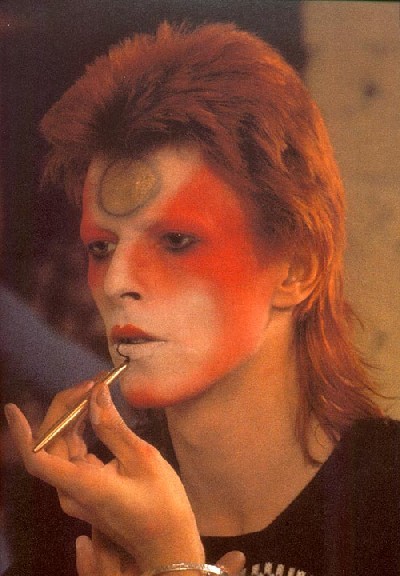 |
| Still love Mr Bowie! |
In my opinion there is a minimum amount of products needed, but I will try to give the very adventurous some options to expand and add some extra tricks in there.
You will need at least:
Foundation and or concealer
1 brown eye pencil
1 lip stick
Mascara
add ons:
Eye shadow
Blush
Powder
First, we start with a clean and moisturized face. If you don’t know how to do so or why you should do so, refer to this post.
If you don’t have a nice prepared canvas, anything you apply to it wont look nice.
I believe we have evolved a little since the 18th century were perfume was the shower de rigueur, so just think of it like that.
 |
| More, I need more! |
 |
| always add a Ryan Gosling meme! |
If you are to lazy to wear it, or you just don’t like it, and or don’t want to spend money for a product you will use 3 times in your life proceed to option number 2.
Foundations is a tricky thing, you need to figure out your skin type, look for a foundation that suits that skin type and then of course find the perfect shade. Proper make up and department stores are your friend! The ladies there will inform you of the foundations that might suit your skin type best and then even proceed to match one to your skin tone!
Beware! It seems to be fashionable to be tan now a days, so many beauty ladies match foundations too dark than their clients skin, just to please the customer. Don’t fall into that trap.
If you want to look tan then use bronzer, if you use too dark foundation it will look off eventually!

Pro tip: Take a mirror and check the foundation outside on the street too see how it actually looks. Check your jaw and make sure that the color matches your neck.
Now, you don’t need to buy a department store foundation of course, but if you know nothing about foundations that trip might be very educational and teach you on what to look for when you buy whatever foundation you want.
Application: The easiest way to apply foundation is to put a little on your fingers, warm it up in your hands and spread it evenly on your face.
 |
| My favorite concealer right now is Misshas Perfect concealer |
It will hide your flaws in a natural way and sometimes make foundation unnecessary.
And if you are into a little alchemy you can even make a foundation out of your concealer!
You can definitely apply concealer on top of your foundation if you have a lot of blemishes, scars or the like.
But if you decide to go with the concealer only route, choose a concealer that you feel most comfortable with and find the prefect shade. Once again people have the misconception that concealers are suppose to be lighter than your skin, unless you are into looking like a panda I would try to find a shade that closely matches your skin.
 |
| Stay on the safe side and match your concealer to your skin tone |
To conceal the under eye area apply the concealer in a sort of triangle shape and blend gently with fingers.
 |
| add concealer to blemishes, for under eye circle apply in the shape of the stars |
Option 3: Screw everything! You do have the complexion of a supernatural creature or simply don’t care how your skin looks then proceed to the next section of the guide.
The eyes!
If you want to own one of those beauty items that you can do a million things with, get yourself a brown eye pencil. Brown suits everyone and can be used in a natural or even more daring way.
Most people think black suits everyone but believe me it doesn’t.
I recommend you choose a pencil with a medium creamy texture. You don’t want it to tuck on your eye when applying it, but also not to smear everywhere.

Application:
Line the upper part of you eye like so:
First make a line from the inner corner of your eye to where your lashes end.
 |
| Hold your eye lid taught for a smoother application. |
For a more natural look you can blend that out with your fingers, a q tip or those spongy ends that come on some pencils.
For the lower part of your eye dot some eye pencil like so and then blend.
For a stronger look make a solid line and then blend.
 |
| Draw line, join them and then proceed to the lower lash line |
If you feel this isn’t exiting enough for you but you can’t be bothered with eye shadow then you can fake an eye shadow look with that same pencil.
With a light hand make little stripes on the outer side of your lid making a sort of v shape for extra lift and depth.
Blend like crazy and voila!
 |
| add some pencil in the shape of the stars, then blend |
If you don’t own one already I recommend picking up a neutral non glittery palette of at least 3 shadows in brown tones.
 |
| My favorite palette Dior Beige Massai, I used to steal this from my mom when I was younger :) |
Start with bare eyes, then use the lightest shade underneath your brow, and on your eyelid and then with a darker shade you do the little v thing again. blend blend blend.
Add the eye pencil as in the first step of the eye section on your upper and lower lid, or use even darker eye shadow to add definition in the same way.
 |
| 1st add light shadow under your brow and on your eye lid, 2nd add medium dark shadow to your crease, 3rd add eyeliner or dark eye shadow |
Now to finish any eye you need mascara. There is a gazillion, just choose one, maybe the one with the most outrageous and fake looking advertisements?
If you are super duper brave use an eyelash curler like so:
 |
| This is my startled animal face |
You apply the mascara going as close as you can or dare to your lash line, and with a left and right movement you slowly brush them up.
Pro tip: Tap the excess mascara on the tip of the wand onto a tissue for a better application, and never ever pump your wand into the tube!
 |
| Left, right and up movement |
Lipstick:
As for the shade if you never wore lipstick before the safest options are a medium pink or rose, or a corally peach. These look the most natural and suit all skin tones. Like the foundation you need to try them out to find the right shade for you. There is a million different formulations out there but my favorites are lip tints, liquid lipstick (not to be confused with lip gloss) and the good old regular lip stick in a tube.
 |
| Maybe a little less up top... |
You might see a pattern here, and yes I dab everything on. It just looks the most natural and lets you regulate the amount of product very well.
 |
| dotted blended |
For visibility purposes i chose a very bright pink!
Now you are at a cross roads again. Either you let your pretty lippy multi task or you delve into the deep and dark arts of The BLUSH!
 |
| dotted blended |
 |
| How I apply powder blush |
swish it back and forth starting a little below your temple towards the apples of your cheeks.
 |
| Work it into your skin, don't just fluff it over your face or you might wipe of previous make up or concealer |
You own a face powder and are dying to use it, or you really want to use powder because its soft and nice and who wouldn’t want to feel those soft fluffy brushes against ones skin.
If you belong into one of those categories take your powder, add it to a puff or brush and roll it against your face in a downward motion to set your make up. Do this as your last step but not if you used cream blush or lipstick as blush. It would stick to it and not be pretty.
 |
| Make sure to not add too much powder to your puff or brush |
And this concludes the longest blog post in the history of nothing.
Feel free to ask questions into my belly or ask for product recommendations!
 | ||||||
| The finished look: left side with eye shadow and right side pencil only, I dont know why the right eye looks so wonky |


